


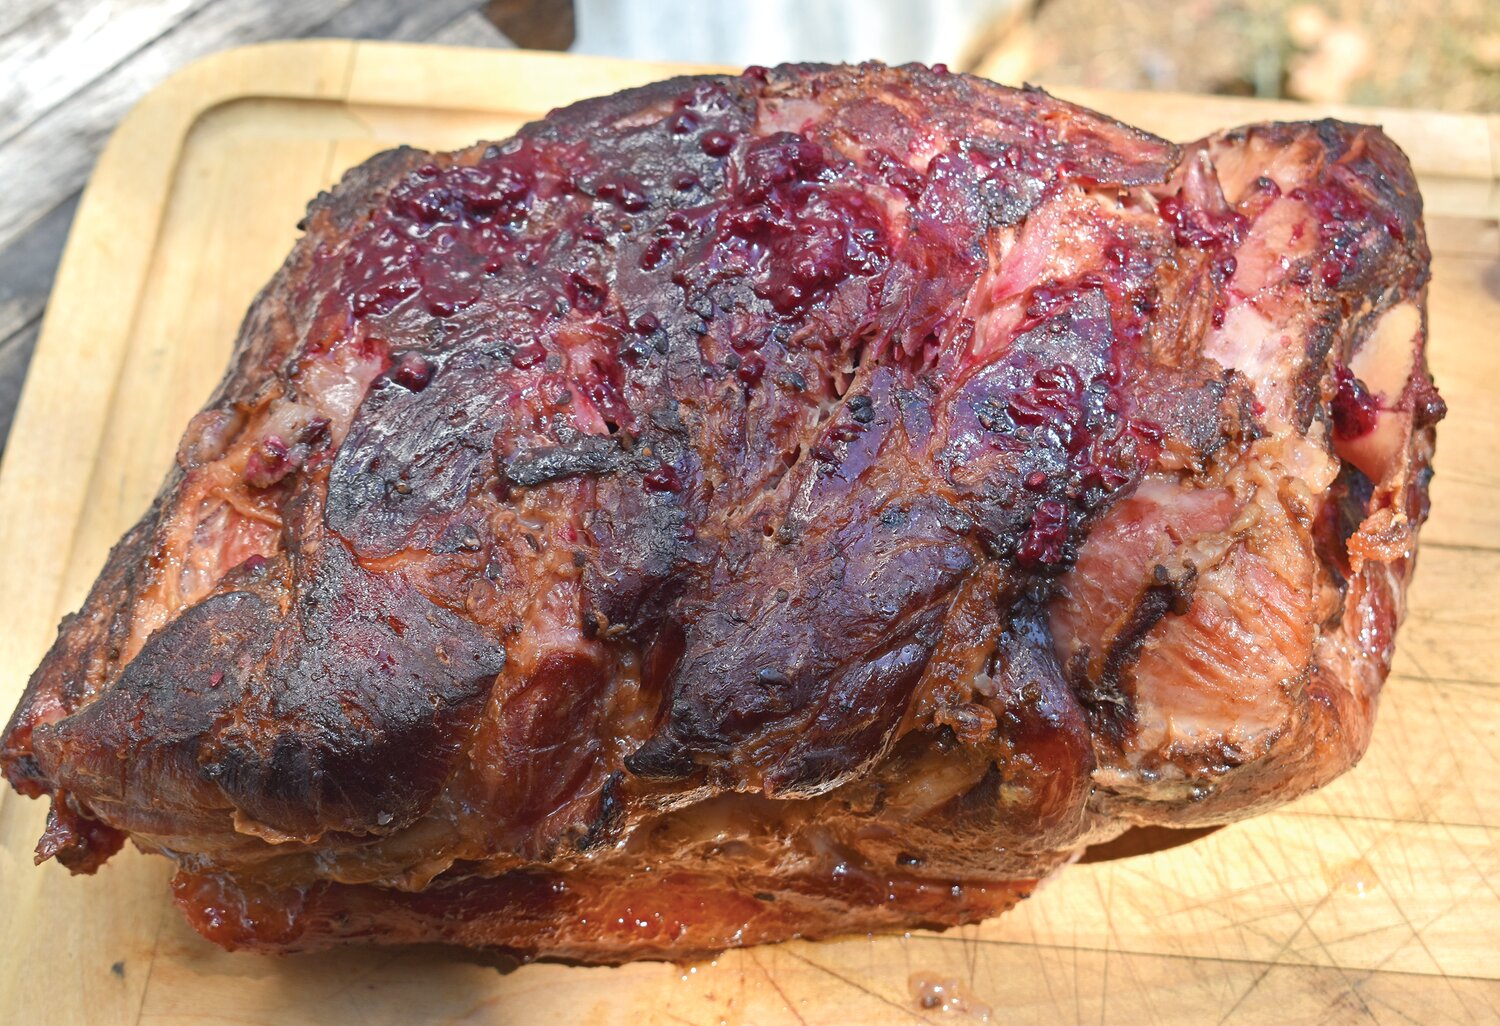
![[right] Wild pork roast. Photo by Luke Clayton.](https://alpha.creativecirclecdn.com/polkcounty/original/20241010-135845-c7c-wild%20pork%20roast-2.tif.jpg)

When I was a youngster growing up in very rural Red River County in northeast Texas, my dad or one of his friends would occasionally kill a wild hog, usually in the “rough” country along the Red or Sulphur Rivers. Wild porkers have been running around the Lone Star State for well over 100 years but back in the eighties, their numbers began to explode resulting in the “hog problem” common in much of Texas and several other states.
With all that good eating pork out there for the taking, I am surprised that more people don’t take the time to learn the differences in cooking wild and domestic pork. Pork is pork but wild pork is usually much leaner; wild hogs have to work to get their groceries rather than waddle up to a feed tough and their meat contains more muscle and less fat. Anything that can be done with domestic pork can be accomplished with hogs from the wild and that includes making cured, smoked ham and sausages.
We always butchered a few hogs when I was growing up and my dad would make sausage and ham from the meat. I remember the process took a great deal of time consuming hard work and once I got away from home, I made it a point to get my ham and sausages from the grocery store. And then, at about the age of 30 with a family to feed and tight budget, I decided I would try my hand at “cranking” out some sausage from a wild hog I killed. I began with pan sausage and purchased all seasonings individually, blended them and made some pretty tasty breakfast sausage. I moved on to smoked links, summer sausages, etc. and later learned how to easily cure and smoke ham.
After years of transforming wild pork into tasty food, I’ve learned that it is much easier and cost effective to simply purchase the kits that contain everything necessary to transform the raw meat into tasty sausage or ham. I am about go into detail explaining how to make cured ham or cured and smoked sausage but first, let’s begin at the beginning, once you have your wild hog on the ground.
Deciding which hog to kill for table fare is really pretty simple. Look at is as though you were at a livestock auction picking out a hog to butcher, would you choose the oldest, rankest boar or a younger, fatter hog. The answer is pretty obvious. I have killed boars weighing up to 160 pounds that made great sausage and ham but if you have the opportunity to be choosy, pick a smaller boar or sow of any size.
Much hog hunting today takes place at night when the porkers are most active. I hunt a patch of woods about a mile from my home and often head out about a hour before dark and plan to hunt a couple hours after dark. I kill lots of hogs back in the woods that are simply too heavy for an older man to drag out. I’ve learned to quarter the porkers, hide on just as an elk would be quartered and packed out. I’ve found that leaving the hide on keeps the meat clean while I’m packing it back to the ATV.
If you have an easy way to get your hog out of the woods, simply field dress as you would a deer and skin and butcher it back at camp or at home but If usually don’t have that luxury. I begin by removing the two front shoulders; the shoulders are not attached to the body with bone and remove easily. Next, I remove the hind legs hide on, by cutting down to the ball joint, severing the joint and cutting the meat close to the hip bone. And then, all that’s left to do is make a lengthwise cut through the hide from the neck all the way to the tail, peel the hide back and remove the two backstraps. The hide around the neck skins easily and the neck meat can be removed from the neck bone. The tenderloins are really small on most wild hogs and not worth the trouble but they can also be removed by cutting behind the back rib. The entire process takes no more than fifteen minutes and is the easiest way I’ve found to keep the meat clean in transport and lightening the load when packing the hog out of the woods. I’ve use a couple of old belts with a cords tied on either end to make a carrying strap for the quarters.
NOW BACK TO PREPARING THE MEAT Regardless which type sausage you decide to make, you must first obviously grind the meat. This can be done with an old fashioned “hand crank” grinder or an electric one. If you go with an electric grinder, make sure and get one that generates at least one-half horsepower. The smaller grinders usually don’t work very well on tougher cuts of wild pork. Decide if you wish to make “bulk” sausage such as breakfast sausage, Italian or Chorizo. These sausages do not need to be stuffed into casings. Seasonings are simply added to the ground meat and then the sausage is packaged and frozen until needed. I always buy pre packaged seasonings. These “kits” contain all the ingredients to make sausage in perfect amounts and they are available for making either bulk sausage or links and summer sausages. I get my seasonings for sausage and cure for making ham from Butcher Packer Supply and on each box are very detailed instructions as to how to proceed. Some sausage makers run their meat through a one-eight inch grinder plate but I prefer using a three-eights inch plate which makes for a bit coarser grind. The meat also flows much easier through the bigger holes, making the grinding process much easier.
If you wish to make links or larger summer sausages, you will need some method of “stuffing” the seasoned meat into casings. This can be a stuffing tube on the end of your meat grinder or a hand crank sausage stuffer which I much prefer. These are readily available for not much more than a hundred dollars and money well spent if you make much sausage. I usually use “natural” casings for links but prefer the collagen casings for making summer sausages. Regardless which type you use, make sure and place the casings in warm water for a few minutes before you stuff them.
With the meat ground and seasoned, most of the work is done. You will need some sort of smoker to give smoke flavor to the summer sausage or links and to supply heat. The key is to slow smoke the meat rather than “cook” it. I usually set my smoker to 225 degrees and, using a meat thermometer with a probe, bring it up to 160 degrees. This process takes from 4 to 6 hours and I rotate the sausages a couple times to avoid overheating. Regardless what type smoker you use, there will be hotspots and occasionally rotating the meat will insure even heat.
Once your sausage is up to temperature, place it on a table outside or sink and “bloom” it by spraying it with cold tap water. This insures the stays “full” inside the casings and does not shrink. I like to place my smoked sausages in the refrigerator for a couple of days and let the cure and seasonings “work”. I think this adds flavor to the finished produce. If you like cheese in your sausage, you can add high temp cheese during the mixing process. My favorite blend is a jalapeno summer sausage by Butcher Packer and I always add high temperature cheddar cheese.
MAKING HAM Making ham sound like a challenging endeavor but in truth, it’s much easier than sausage making. It’s possible to cure the entire hind leg of the hog, bone in which I have never done and have no plans to begin. I much prefer to cut three pound pieces from the upper ham or sometimes the back straps and cut them into smaller pieces. These “chunks” of pork will cure thoroughly in 7 days. I use the dry cure method and always use sugar cure rather than the more salty cures. I begin by rubbing the pre packaged sugar cure into each piece of meat and then coating the meat with dark brown sugar. Next place the pieces of meat in a plastic container and place it in the refrigerator for the 7 day curing period. I often add a bit of honey to give added sweetness to the meat. After seven days, remove the meat from the container and place in your smoker. I begin with a very low temperature of about 120 degrees for a couple hours of heavy pecan, hickory or wild plum wood smoke. Then I crank the heat up to about 150 degrees for 3 or 4 more hours. At this point your ham will be thoroughly smoked. I place the smoked pieces of ham back in the frig for another week to allow the meat to “mellow”. At this point, the ham can be fried or baked or frozen for future use. To be truthful, I always enjoy a big breakfast of ham, eggs and hash browns as soon as the smoking is complete. Just make sure and always remember to cook your homemade ham before eating. Cook it in the same manner that you would if using “store bought” ham from a domestic hog.
Luke and his friend Larry Weishuhn recently released their new co-written book, “Poor Man’s Grizzly”, all about hunting wild hogs and preparing the meat. Available through www.larryweishuhn.net and www.catfishradio.org. n


